Hi friends!
Here is the second part to the breakdown, as promised!
I have good news and bad news. The good news is that I have been asked by 3D Artist Magazine to create a tutorial on my process for the hair, but the bad news is that it wont be included in this breakdown tutorial for that reason. I will announce when it is published for you to grab a copy and check it out :)
Instead I will cover a bit about my Xgen process for the eyebrows, lashes and clothing fuzz! Enjoy!
Step 6: Posing
Now that I have some textures done I decided I'd pop back into zbrush to use the transpose master to give the girl a quick pose to match my concept. I also took this time to scale up my model to match real world scale. This is really important to do when your using physically based renderer such as Arnold. The shaders are much easier to fine tune, and your lights will react properly without having to make crazy adjustments.
After I found a pose I was happy with I then exported out all my maps and meshes with zbrushs multi map exporter tool to bring it all into Maya to setup for my lookdev with Arnold.
Here's a great site to help you with all the settings for whichever renderer your using: Displacements
Step 7: Lookdev
Next I brought all my posed geometry from zbrush into Maya and began setting up my Arnold subdivision for every object that needed to be smoothed upon render time. I just set my type to catclark and match my subdivisions to the same as I had for each piece in zbrush. I do this so that I ensure my displacements will make my model look exactly like my sculpt in zbrush. Sometimes if you don't match the subdivisions it may not displace smoothly and you will see the polys. The tutorial above should help you with setting up displacements in Maya as well.
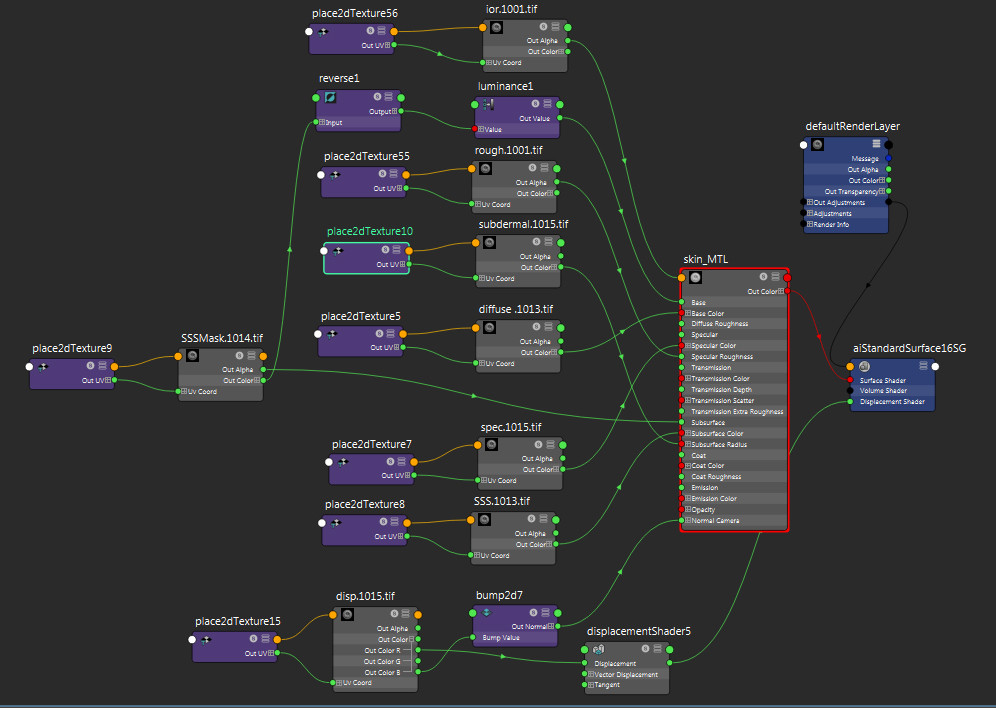
I also took the time to combine my displacements for the face from mari and zbrush in photoshop. I combined the red channel from the Mari projections with the export from zbrush and kept the other channels the same. Here's a screen grab for how all my textures connected to the aiStandardSurface material I used for the skin.
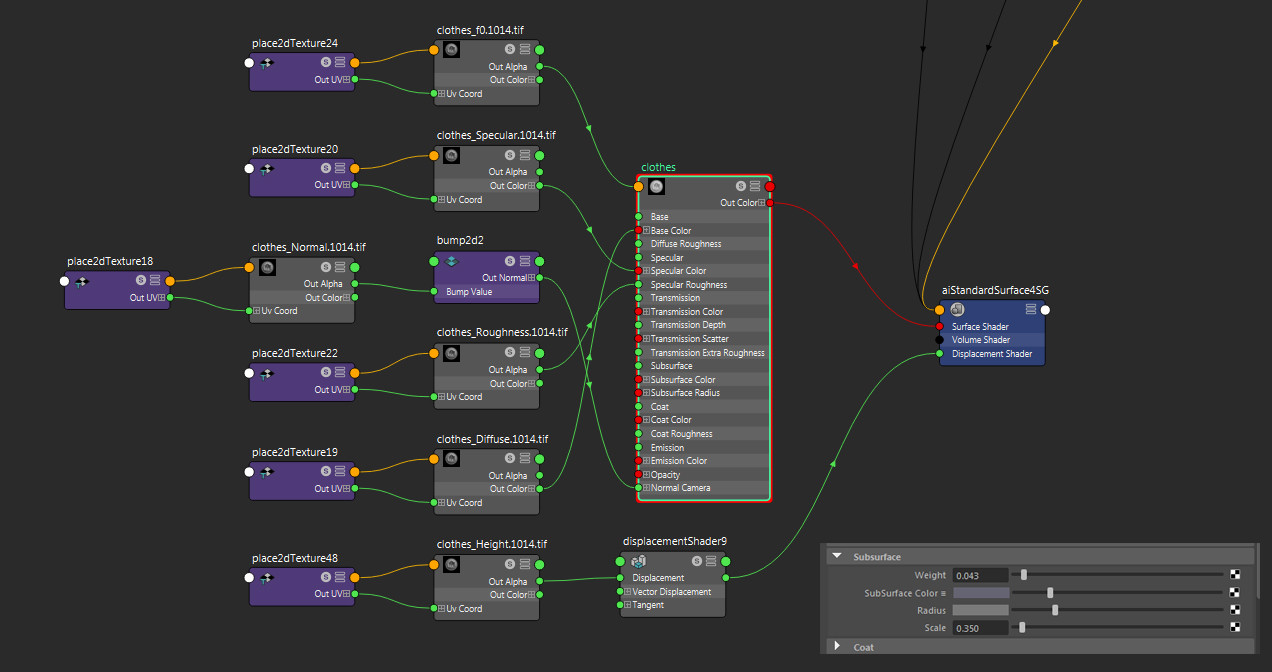
The clothes were quickly setup by just plugging the appropriate maps in from substance painter. I only added a little bit of sub surface to the clothes to make them feel just that much softer. I also pushed my displacement a bit further to exaggerate the pattern because I find it gets a little lost sometimes when sub surface is added.
When I was choosing my route for the eyes I knew they needed to be stylized to keep everything in that realm. It felt odd to have them realistic. This decision was made after I had already textured a version of the eyes realistically and I really didn't like it. So I decided to follow a tutorial I purchased a while ago for creating procedural eyes in Maya. I loved doing this because now I can reuse these eyes for any render engine, and any character. This tutorial was super useful and super user friendly. Go check it out! These eyes ended up being exactly what I was looking for.
Another small thing I did was add some waterline geo to the brim of the eyelids. You can barely see this but it helps to sell a wet look to the eyes.
Ill talk about the hair shading in the xgen step.
Step 8: Hair Groom with Xgen (broad overview)
So my first steps before starting the xgen was to triple check that my project was set. This is super important so that you dont lose work and your xgen saves to the proper folders. The next step was to create cap geo out of a decent resolution of my mesh. I usually choose to not make them out of the lowest because its nice to have some of the sculpt detail in so you can have the hair follow the curves properly. Xgen does have a displacement maps option you can use, but I prefer this way. The cap geo looks something like this.

I like to create cap geos not because im simulating (its good for that too) but because it helps me keep the hair away from my clean geo. I make these cap geos not visible at render time or cast shadows so they basically dont exist. The next step is to make sure your uvs for these meshs are in udim 1001. This matters because xgen bakes your painted maps down to ptex inside maya and this only works on udim 1001 (uv space 0-1).
Now that I have all my basics setup I started the simpler hair first. I chose to use a guide based system for all the hair.
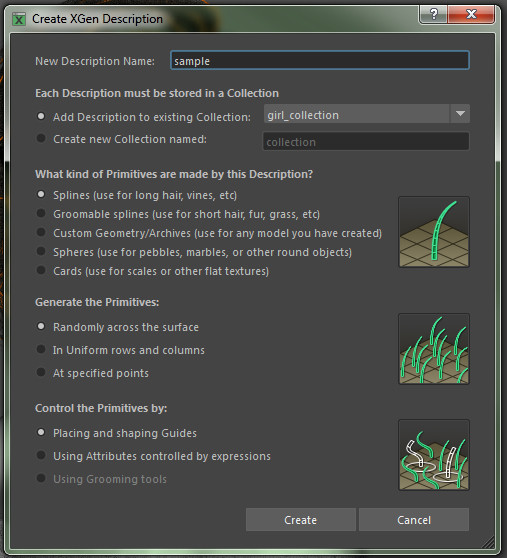
I started with the lashes and eyebrows. I just created guides and moved them around to match the shape I needed. I also painted density maps to mask out where I wanted the hair to grow from and where I wanted less/more hair.
After having my guides in place I started adding my modifiers. I love this stage of creating a groom because this is the moment your hair goes from 0 to 100 really fast. Jesus FC has a wonderful set of quick 6-7 minute lessons that covers all the basics of xgen and modifiers so I recommend checking that out to learn more. I really valued the lesson on the clumping modifier. For every hair style your modifiers will change, but here's a quick look at the modifiers I have setup for each my descriptions.
I did end using 6 descriptions in one collection for this character; eyelashes, eyebrows, headHair, flyaways, shirtFuzz, and necktieFuzz.
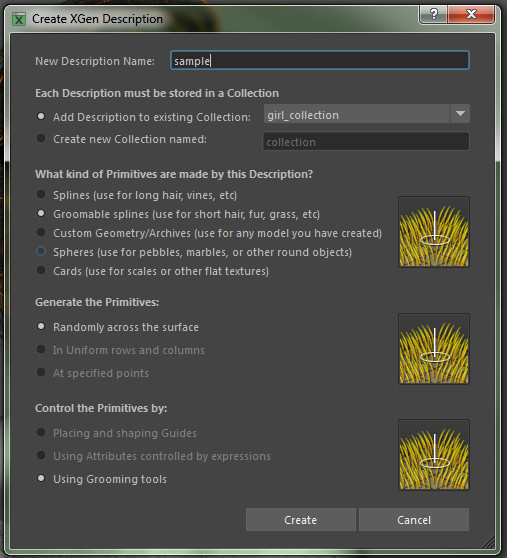
Now to talk a little about the shirt and necktie fuzz. I chose to do these with a groom style approach vs guides. I chose to do this because it was a quicker way to get an even distribution of fuzz over the surface and the only editing I needed was in the modifiers.
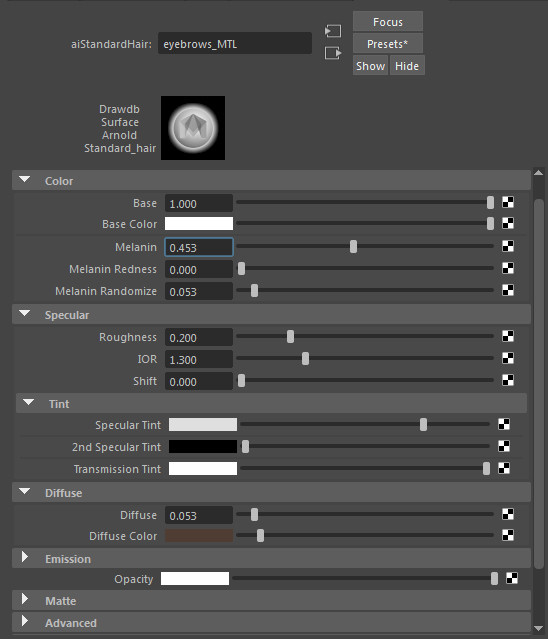
I used the ai standard hair shader for all the hair. The hair shaders for the eyebrows, lashes and fuzz were setup as basic colors with some melanin randomize added for color variance.
Step 9: Lighting
I usually setup a really base light before I start my lookdev stages just so I can get the proper feeling for my materials when developing them. I then continue to fine tune the lights up until the very end. When I started the lighting I took the time to examine and determine what kind of portrait lighting was used. I came to the conclusion that butterfly lighting (or called paramount lighting) was used. This means when the light is directly in front and above the subject creating what looks like a butterfly shape underneath the nose. So I began to setup a 3d version of this in Maya using Arnolds area lights. This is what it looks like:
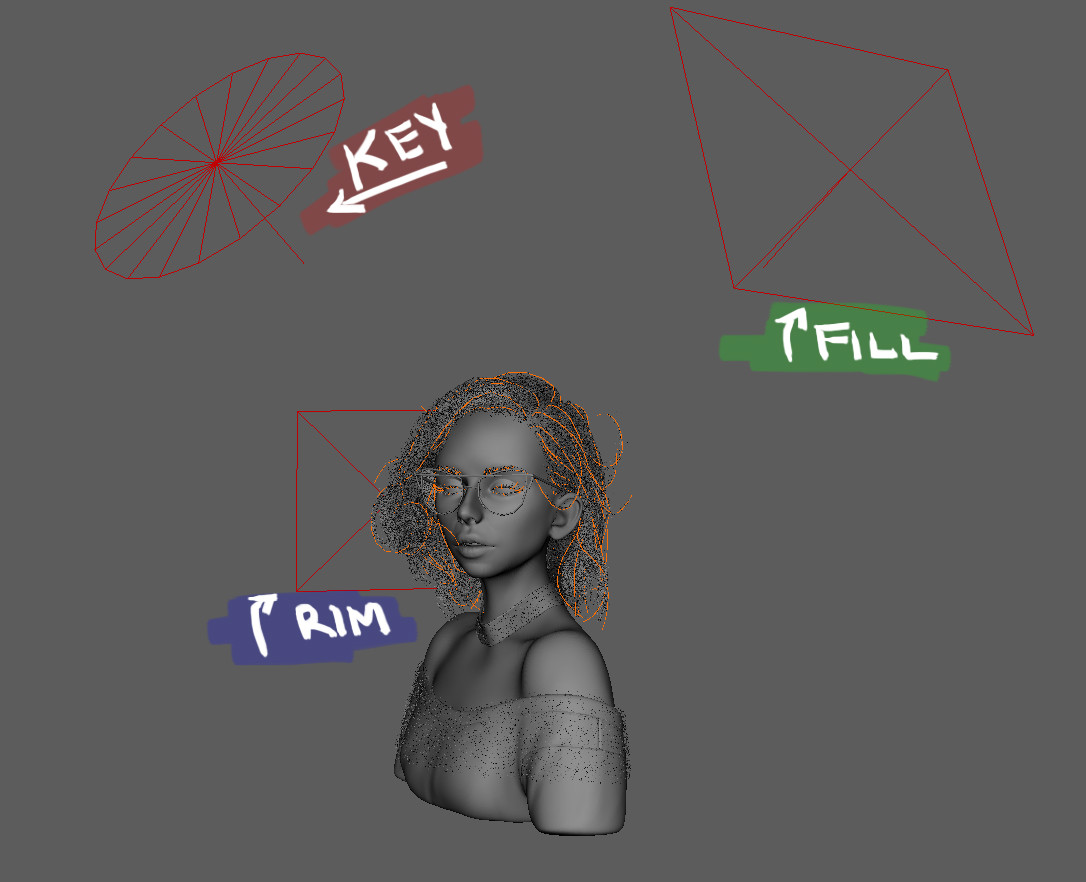
I also have a dome light in the scene for an added fill and to help provide some realistic reflections. I chose one that was the interior of a portrait studio to help set the mood and place her in the right environment. Here you can see the key, fill and rim light (RGB) and then adding the dome light on top with mauve. Sometimes I do like to light in RGB with greyscale models so I can see exactly what each light is doing and how it is contributing. This can be a really great way to troubleshoot your lighting if needed as well.

Step 10: Compositing and Presentation
When compositing any project I usually do it with NukeX. I rendered out my final image as a multi layer EXR with intentions to split it apart if needed but I found I got my final render from Maya pretty close to what I wanted my final image to look like so there was minimal compositing done on this specific project. I think the only challenging part of the presentation stage was trying to not over populate the BG with too many lights. I wanted it to feel simple and clean but with a tiny feeling of complexity. I also like to add grain to my 3d images and a little bit of blur. I learned this from my time as generalist working next to compositors. I was taught that everything CG will feel a little too crisp so its great to add a tiny bit of blur to your overall image to help it feel a bit more real, even if its barely noticeable. Adding grain also helps because anytime you take a photograph or record film there is some natural film grain that's added ontop of your image. So I decided to add these two things to help it feel more like a real portrait.